
How to Integrate Photoshop Design Boards into DesignFiles
If you’ve been around here for awhile, you’ll know that two of my favorite pieces of software for e-design are Photoshop and DesignFiles*, but one unique thing I do is use them together to create a beautiful presentation with a shopping list for my clients. One question I get a lot though is how? How exactly do these two go together when it comes to my project workflow?
Well, today I’m going to shed some light on that! I’ll show you my step-by-step process for how I do this seamlessly without creating a separate mood board. I’ll walk you through it with some screenshots since this process is much easier to watch unfold than it is to explain it with words alone.
Before I dive into the how-to, I want to share why I do it this way. Why put in the extra effort to make a Photoshop design board instead of just using the tools within the DesignFiles platform? The reason is because Photoshop gives me tremendous flexibility to create the exact look, feel, and level of detail I want for my design boards. DesignFiles has some really wonderful tools and capabilities for building rooms, but it’s not quite robust enough yet to offer the kind of realistic look that I like to create for my clients. (P.S. Want to learn how to create these boards in Photoshop like the ones you see here? Check out my course on how to do just that!)
What DesignFiles does really well is adds polish and professionalism to my client experience (that’s important!). Using Photoshop alongside it just uplevels what I can offer them.
DesignFiles does have 3D rendering capabilities now, which is great, but note that you’re limited to the products they have in their dedicated 3D library and it’s not super easy to find what you need (at least right now!). Also, the products you upload to your library don’t cross over to the 3D library.
So! That’s they why behind this method. Now let’s get into the how!
How I use Photoshop in conjunction with DesignFiles:
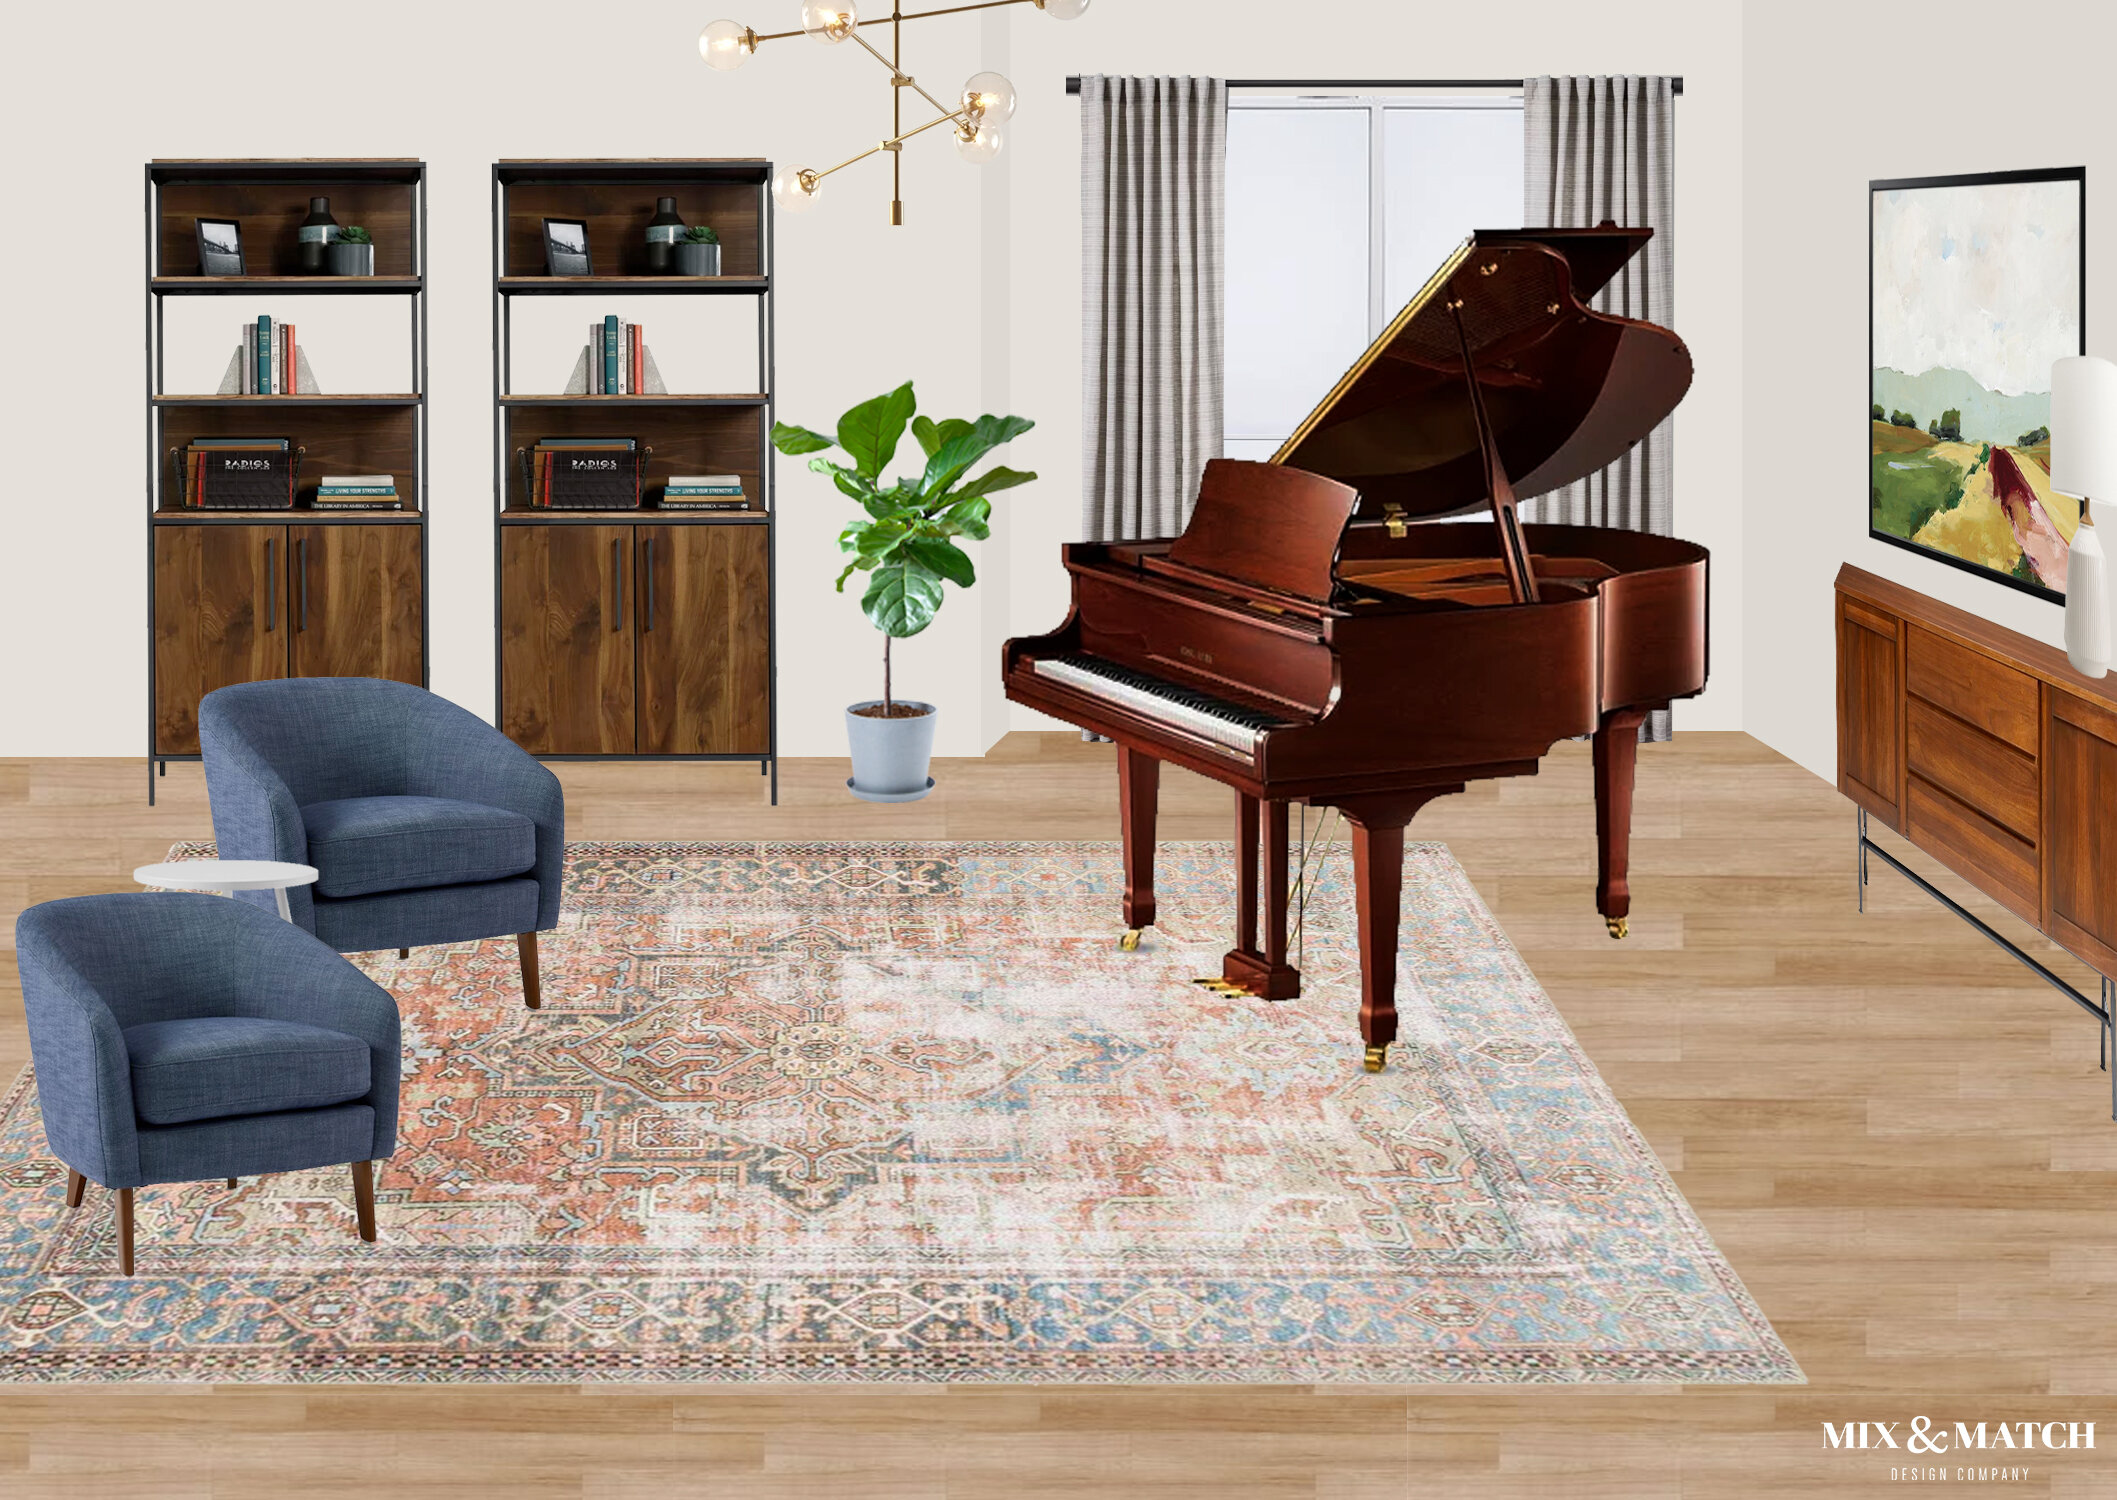
1. Create your design board in Photoshop and export it as a JPG file.
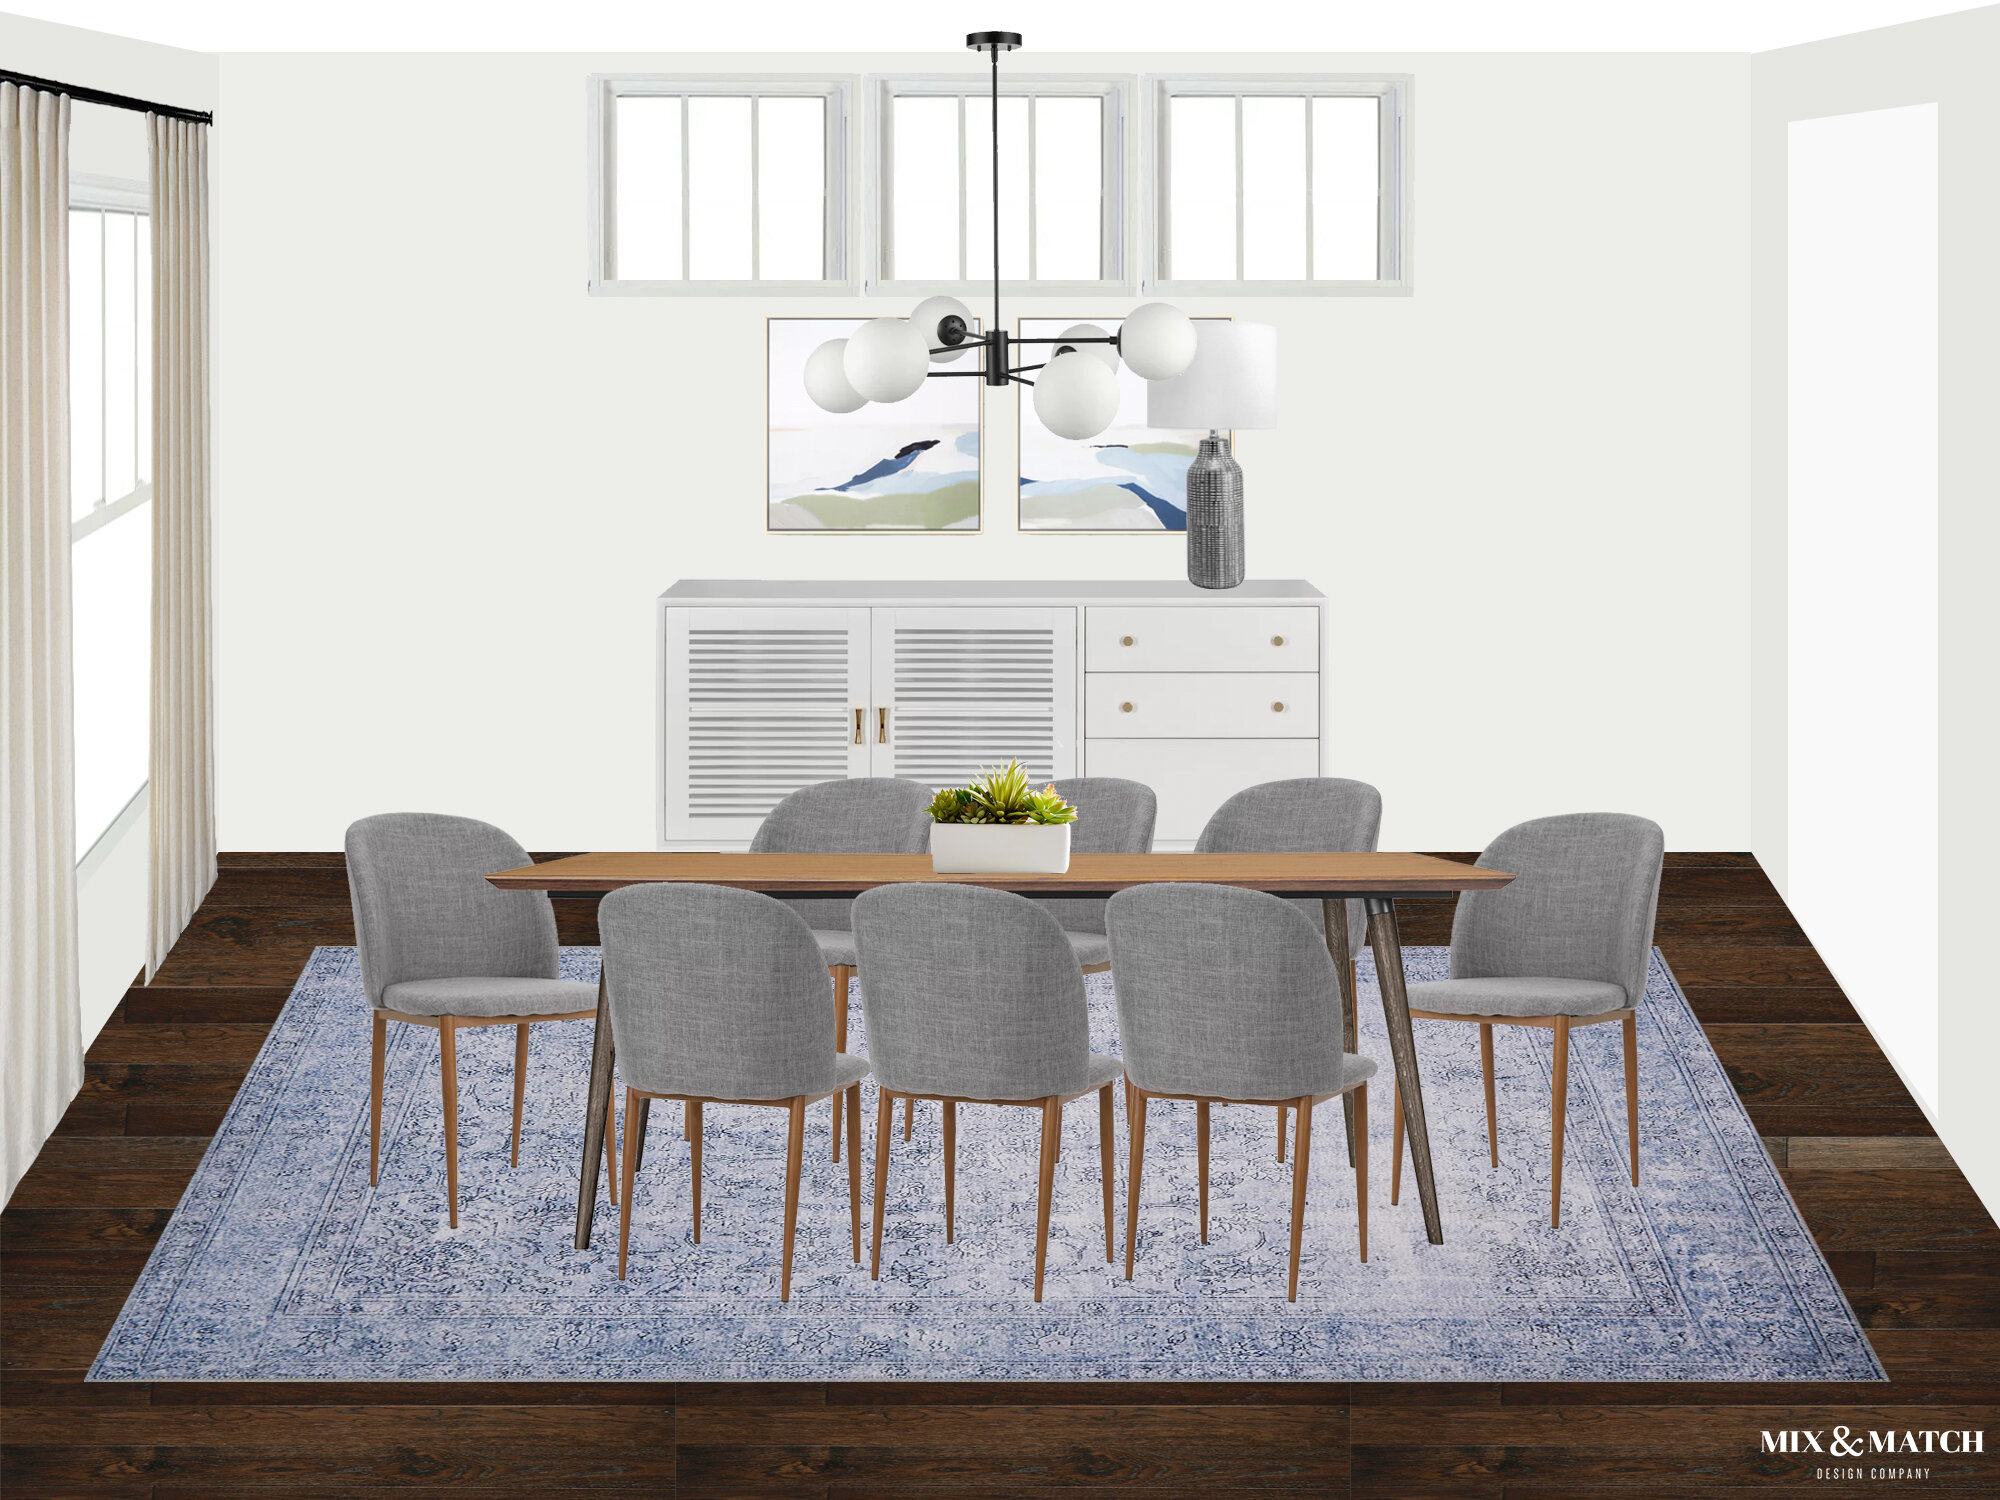
I’ll use this dining room design board I recently created for a client in my example here! When I export it as a JPG, I can then upload it to DesignFiles as an image in my library. I’ll show you how in a bit.

2. Create a new project in DesignFiles.
The new project’s workspace will appear as shown in the screenshot below:

3. Click Create Design and then select Moodboard/Roomboard.
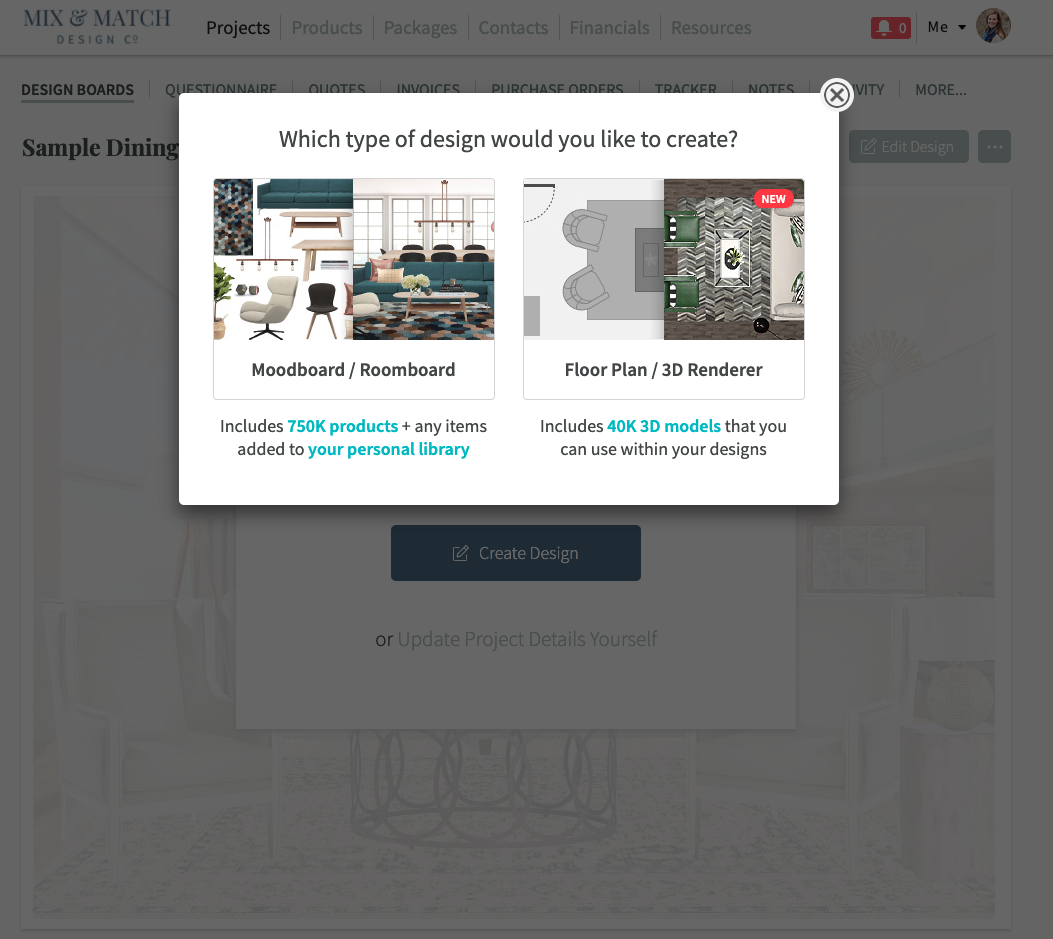
A blank board will appear. This is where you’ll eventually be placing that Photoshop design board that I showed you at the beginning!

4. Upload your Photoshop design board to your library.
In the upper righthand corner, click the Upload button. You can choose to either add it to My Library or the Project Items tab - both work! Once you go through the steps of selecting the image from where you’ve saved it on your desktop, the design board will appear in your library here as you can see in this screenshot.

5. Click and drag your design board image over to the blank DesignFiles board.
Resize it to fill the space as much as you can. Your goal is for your client to see a big ole image of their newly designed space!
Whenever you add a new image that has any white areas, you’ll notice that the image looks a little weird - we’ll fix that in just a minute with their Background Removal tool.

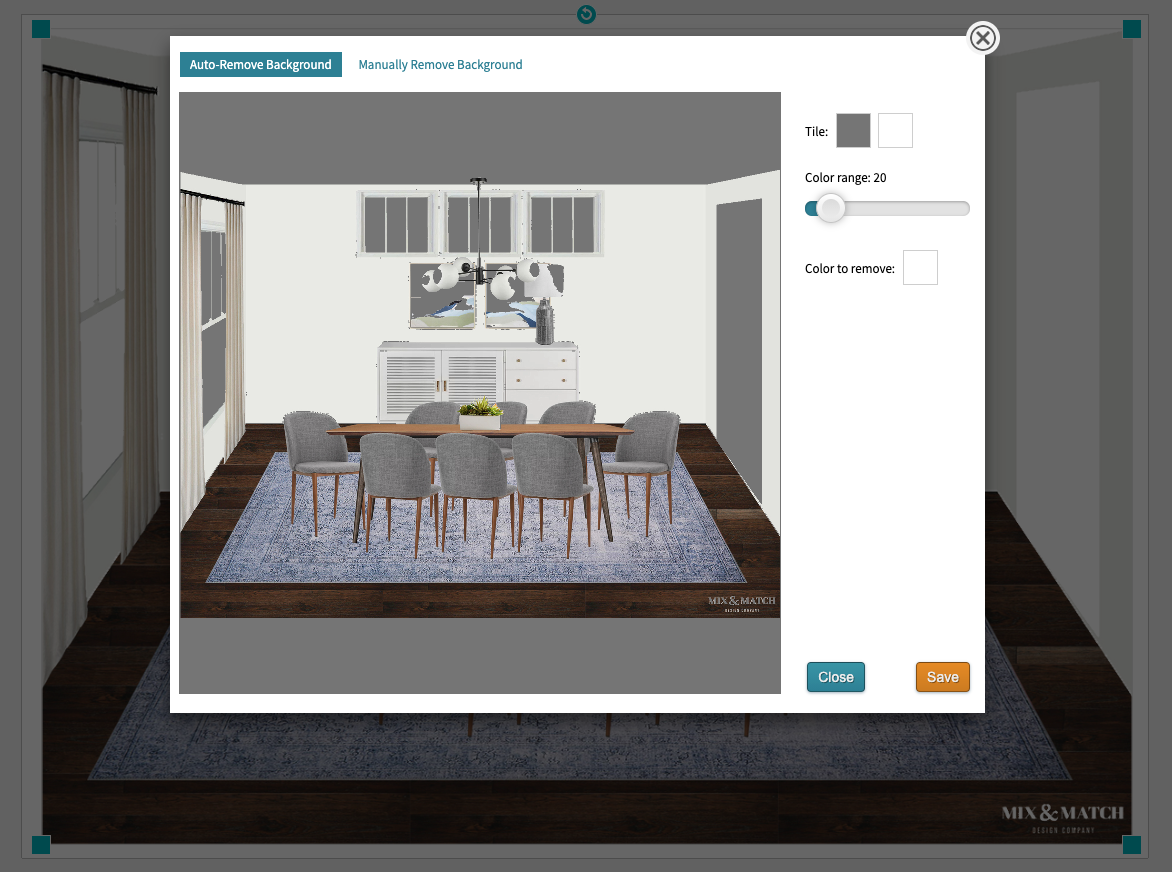
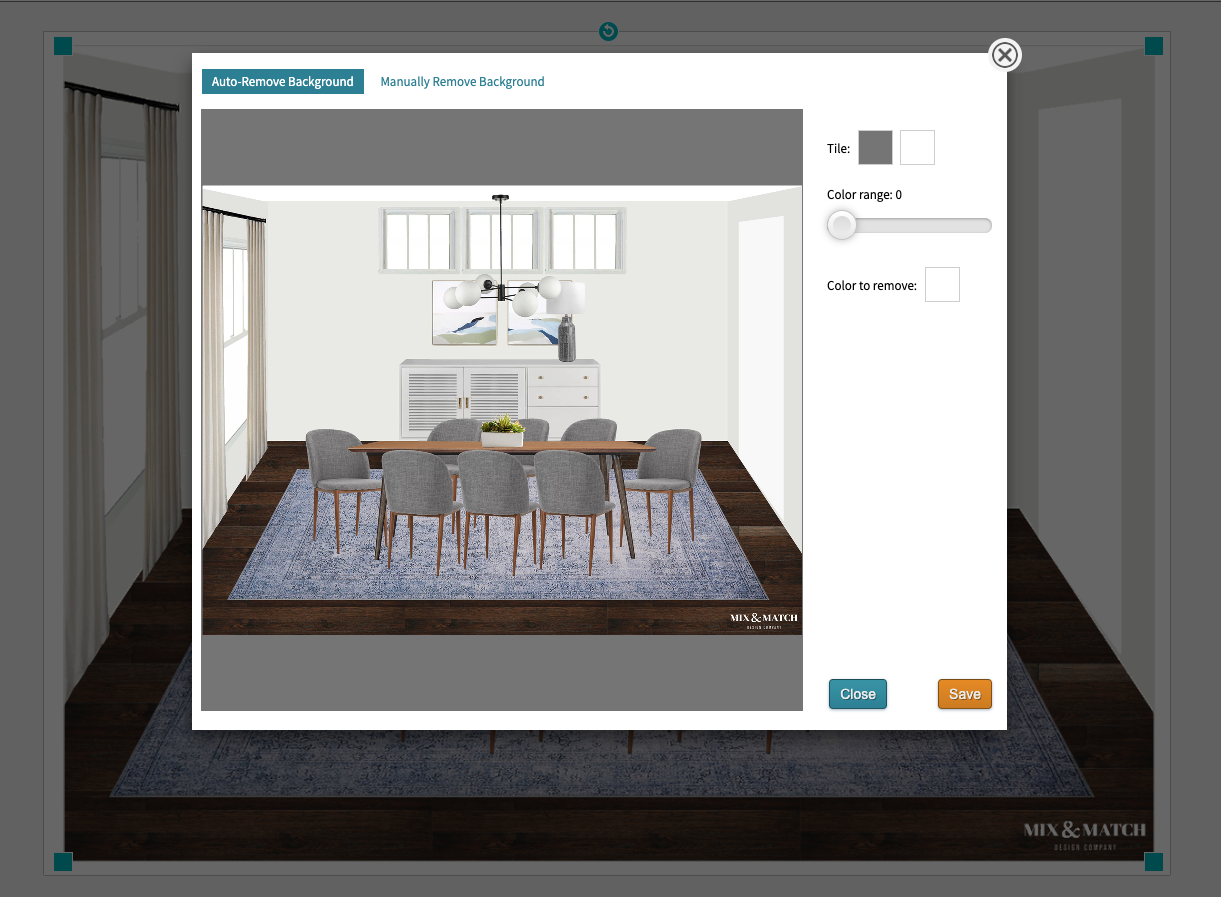
6. Set the Background Removal tool’s slider to 0.
Over in the toolbar on the left side is a Background Removal tool (third button down on the left column). When you click that, you’ll see that the slider’s default Color Range setting is 20 and the default color is white. You’ll want to move that over to 0, which will fix those strange looking white areas in the photo. See the difference between 20 and 0 in the screenshots below!
7. Create your shopping list by adding products to the board.
For this example here, I’m assuming that I’ve already added my products for this design to my library. They’ll appear in the My Library collection in the menu on the right side of your workspace. Click and drag the items for this design to the board. It doesn’t matter what they look like on top of the board - we’ll be hiding them in a minute! They have to be on the board though if you want them to appear in the client’s product list.
Quick tip: I like to drag my products to their respective areas on my design board so I can keep track of what I’ve added and make sure I haven’t forgotten anything. This is a good check for me and helps me be efficient when I’m creating shopping lists for clients.
Once you’ve added everything, head to the next step.

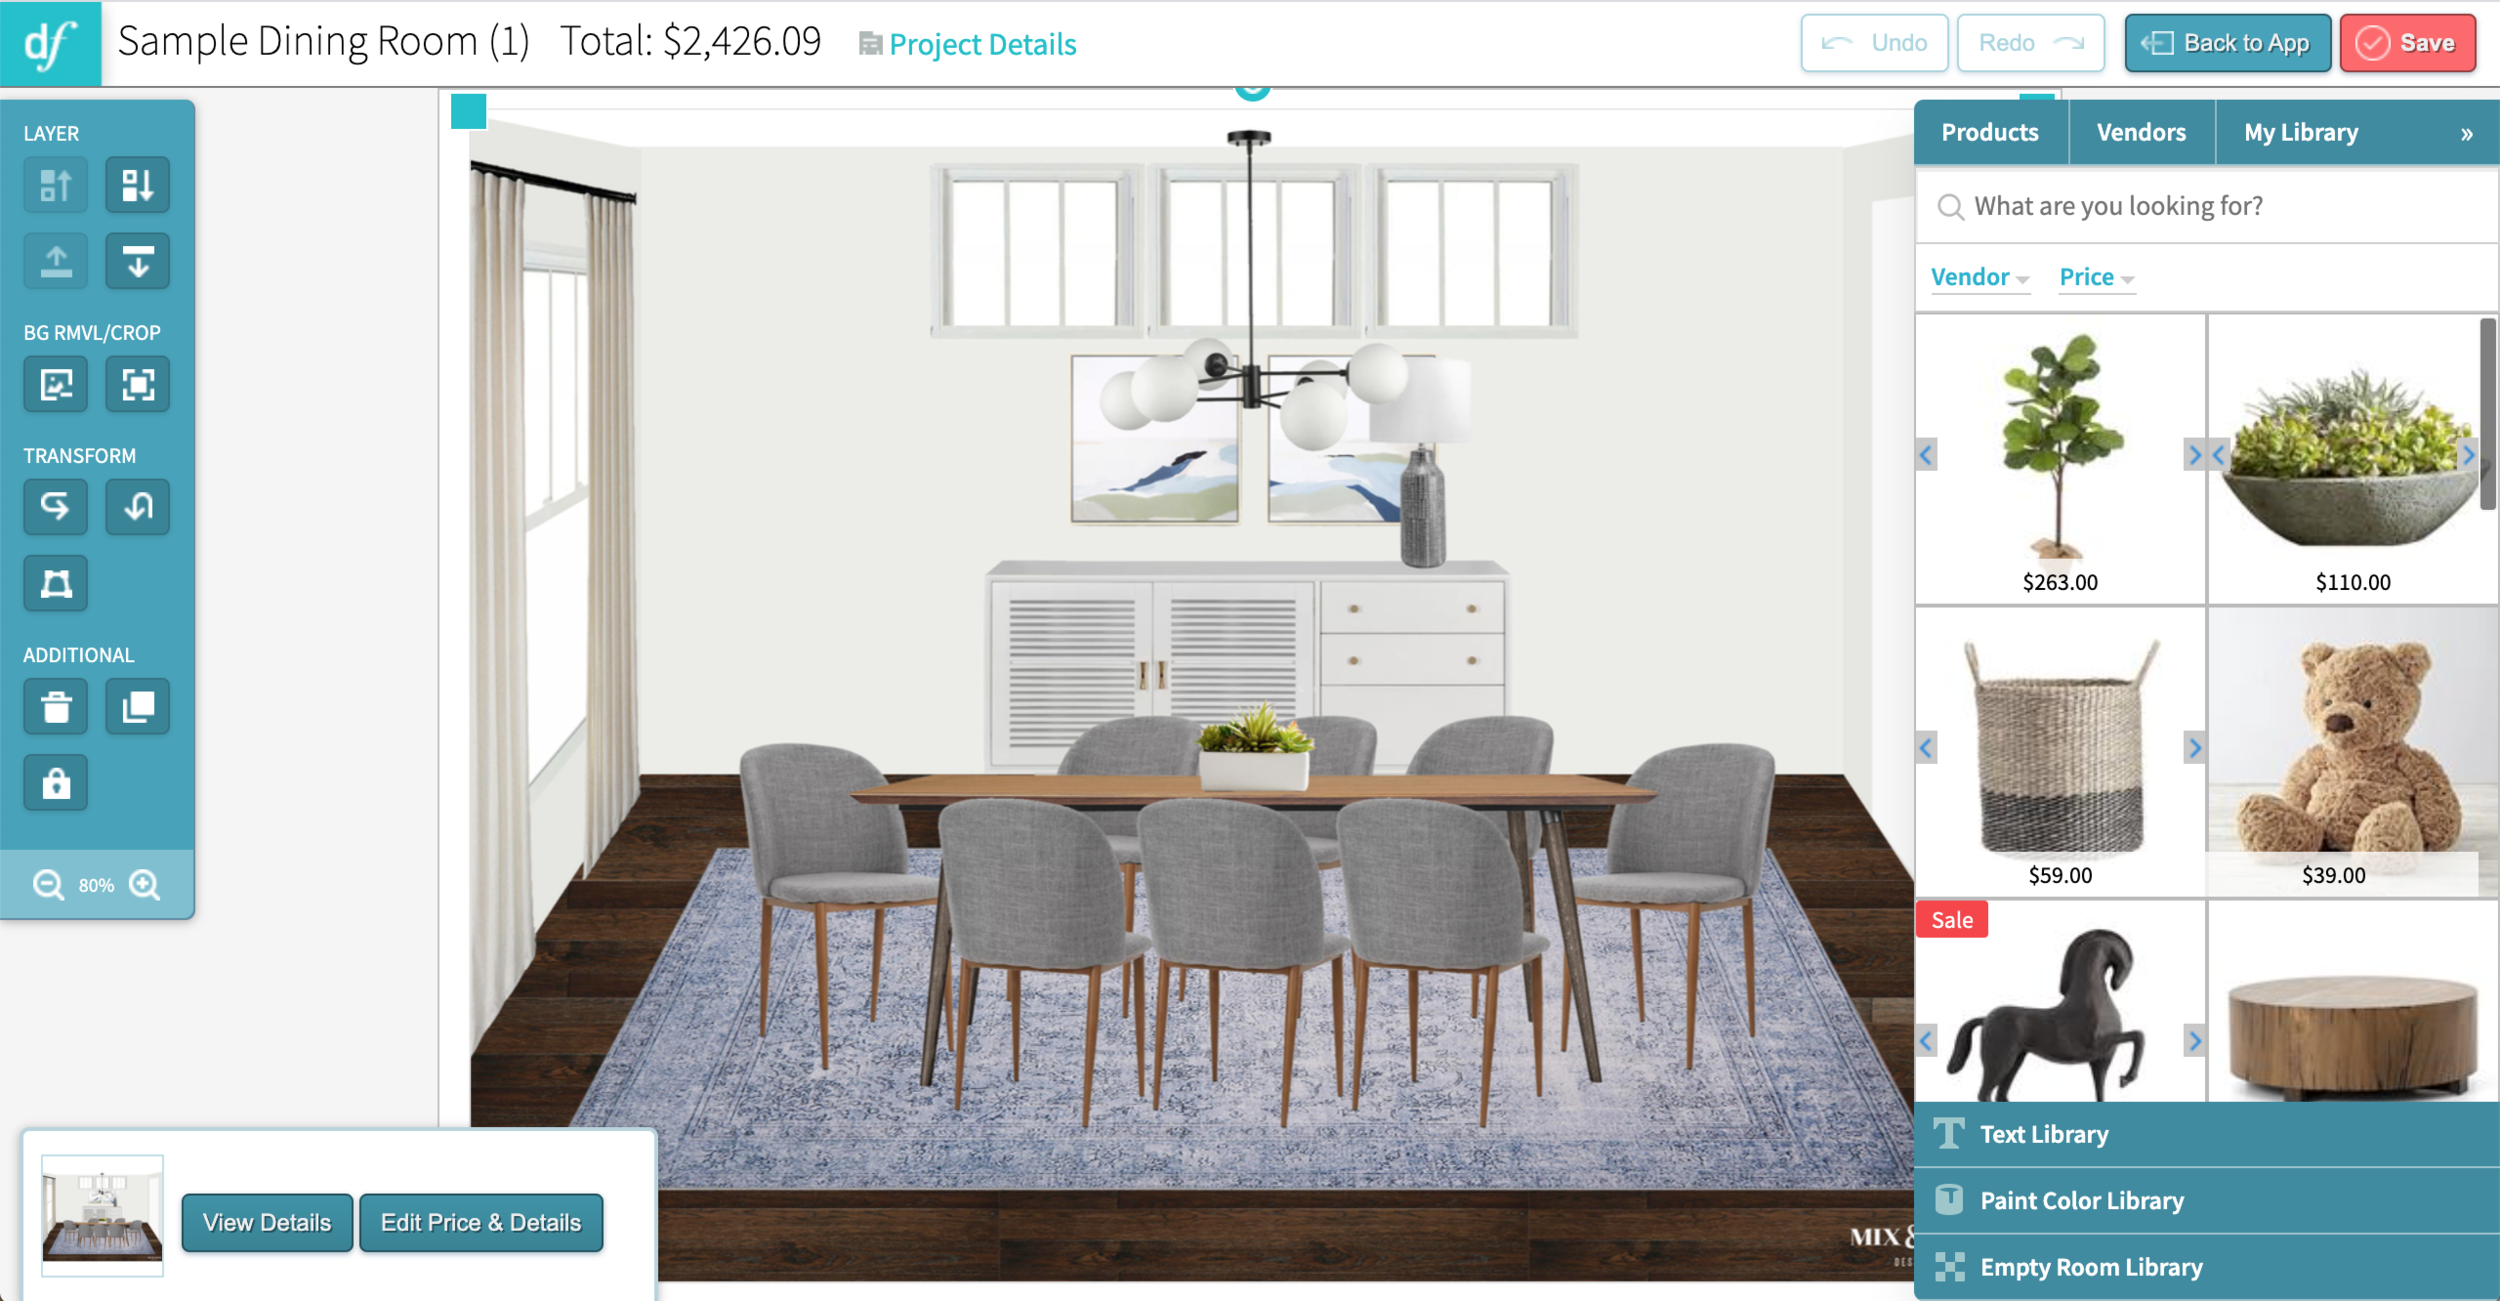
8. Hide the products behind the design board so that you only see the design board itself.
The way you do this is to change the order of the layers. First, click the design board so that it’s selected. Then, under the layer section of the toolbar on the left side of the workspace, click the button to bring that layer to the top. It looks like an arrow with a bar below it.

Then your board will look like this again! All nice and clean. You’d never know there was a mess of products behind it. :)

9. Click Save and then Back to App.
You’re all done with the backend workspace!
10. Make any adjustments to your Product List as needed.
At the top of the page, you’ll just see your design board, but when you scroll down, you’ll see the Product List with all of the items you added to the room. Here you can adjust the quantities if needed and you can manage what a client sees when they view their list.

That’s it! It may seem like a lot of steps at first, but it all happens pretty quickly. I love the clean look of just having the design board showing along with the product list below. It keeps everything in one place and is a great reference for the client to go back to in the future if needed.
What do you think of integrating Photoshop and DesignFiles? Is this a process you’d make a part of your workflow?

*This post contains affiliate links, which means Mix & Match Design Company earns a commission from your purchase/subscription at no cost to you.